Tag: furniture

  • Sapele Round Table

    Sapele Round Table

    harmonsonround1

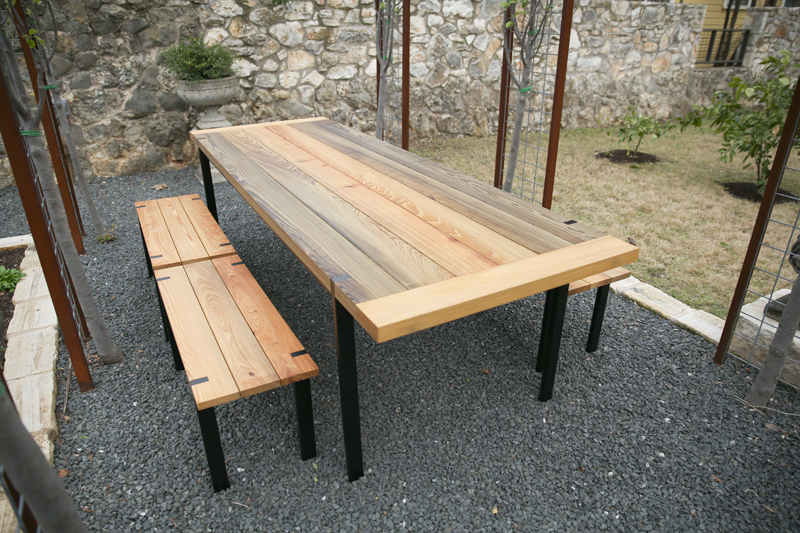
    This table was commissioned to be a meeting table for guests and clients at my client’s office. I had previously created other furniture for his office in a style that mixes traditional details and arranged in a modern way – Harmonson Desk & Harmonson Credenza. I wanted to keep those same ideas with this round table, so I worked on blending the traditional elements with modern elements without one being over bearing.

    [singlepic id=179 w=320 h=240 float=center]

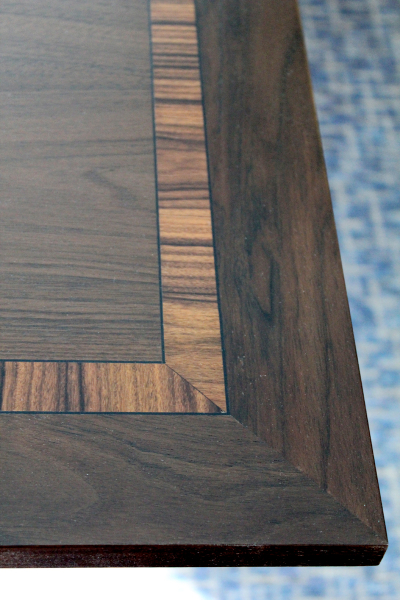
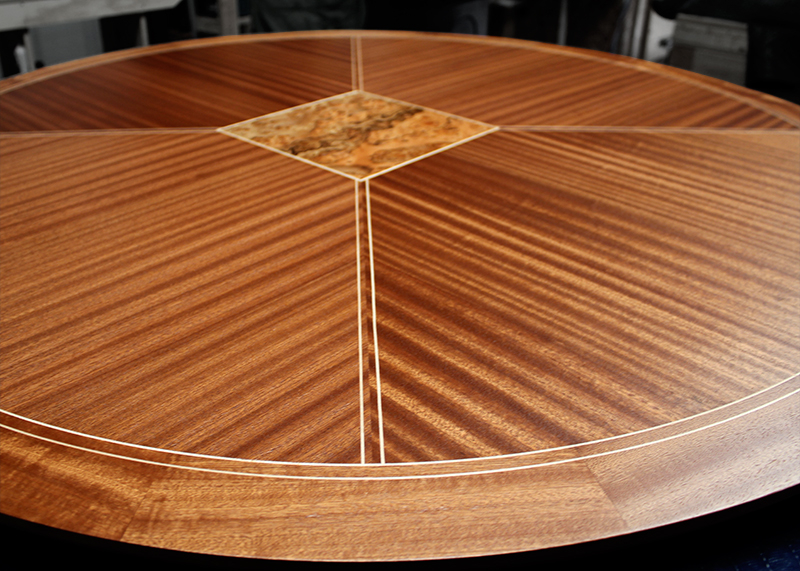
    The top is a beautiful 1/16″ thick ribbon striped sapele veneered top. The perimeter of the top is made out of solid wood not only for looks, but for protection. I arranged the sapele veneers in quarter section so that each quarter lines up to meet in the center. This pattern creates a V- pattern where each sections meet. Since I was able to get a nice consistent line, I didn’t want to hide it so I decided that instead of doing a single inlayed line, I would do a double line and have the V-pattern become another focal point. Having that double line also meant that the lines need to terminate to the perimeter in a thoughtful and graceful way so I decided on another double line that follows the curve of the top.

    [singlepic id=177 w=320 h=240 float=center]

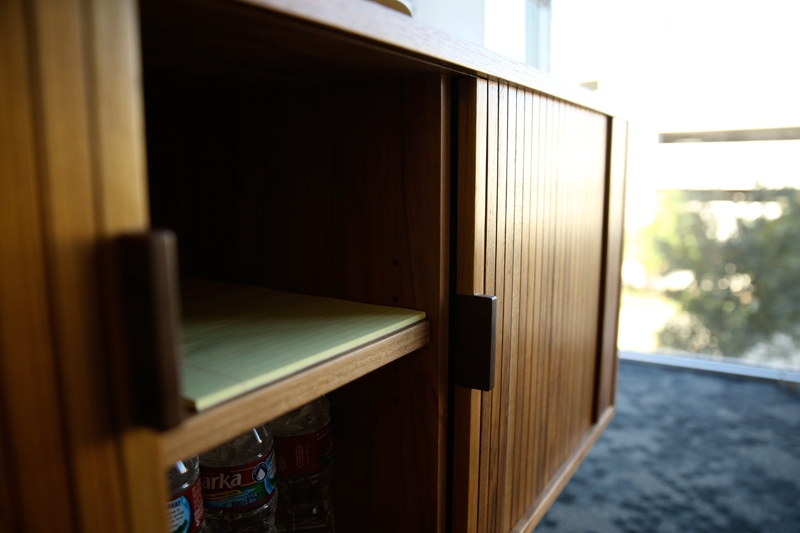
    To keep the modern element, I decided on a tapered square pedestal base. The sapele is used again for the panels, which sticks out 3/16″ to create a three dimensional element. The framework is blackened hard maple. A lot of the design elements of this round table is actually based on a square- the tapered pedestal base and the top being broken into quarters- so I wanted to follow that theme and create a square centerpiece with a decorative wood (pepperwood burl). I think the square ties the top and the base together.

    [singlepic id=178 w=320 h=240 float=center]

    The square is oriented so it looks like a diamond with the double maple inlay stringing terminating at each of the corners. I’m very happy with the combination of sapele and pepperwood burl together. The tones compliment each other and the straight lines of sapele counter-act the free form wazy grain of the pepperwood burl.

    [singlepic id=176 w=320 h=240 float=center]

  • Yuta Standing Desk

    Yuta Standing Desk

    a3d88286a8c411e38fd8126050b2ecd3_8

    My brother, Yuta, commissioned a standing desk from me for his office. He’s been wanting one for awhile and had an Ikea one for his home office. He complained that it wasn’t sturdy and would wobble every time he touched it. I had also created a standing desk speculatively earlier, so I had him check it out so we can nail the dimensions down. The thing with standing desks is that there is not a standard size like most other furniture because we’re all different heights with different arm lengths and etc, etc.

    [singlepic id=164 w=320 h=240 float=center]

    Since he works for a media production company, he had to have plenty of space to sprawl out papers or editing equipment as well as his big computer monitor. I set about creating different levels of surfaces- one for his monitor, shallow and higher up so the eyes are level with the monitor. I created another level under the main surface so he can quickly clean the worktop and added drawers for extra storage. There is also a shelf towards the bottom where he can rest his feet on, store more things, and also to act as a stabilizing rail.

    [singlepic id=166 w=320 h=240 float=center]

    The difficult part of designing this piece was balancing out the size and bulk of the piece. The top came out to be 30″ wide x 58″ long. I started by cutting away angles- a large one in the front and a subtle one in the back. The desk had to match the rest of the room’s existing furniture (another desk I made for his birthday earlier) so we decided on pine plywood with the edges exposed. I kept going back and forth on this with myself, but I’m glad I stuck with it because the tone, color, and the grain is elegant. I’m especially happy with it because it uses an affordable material and shines it up with the use of thoughtful design and good craftsmanship.

    [singlepic id=167 w=320 h=240 float=center]

    To keep the light color, I used water-based polycrylic. The drawers are made from ash with the drawer front made from sinker cypress. I used UHMW plastic to act as drawer runners so the drawers won’t run a groove into the desk from use over time.

    [singlepic id=168 w=320 h=240 float=center]

  • Outdoor Tables + Benches

    Outdoor Tables + Benches

    bergoutdoor1

    My clients have a backyard garden area that would be the envy to anyone. The landscape architect designed an elegant area where people can hang out and socialize next to freshly growing vegetables, with the smell of smoke and cooking from the grill, and enjoying good company under an arbor with fruitless bradford pear trees

    [singlepic id=152 w=320 h=240 float=center]

    The arbor  was started a few years ago and is just now getting to be filled out so my clients wanted to get a nice outdoor table to dine under. They wanted something classy that blends in with the landscape, but without being too rustic. They have a few stone sculptures that reminded me of a Tuscan winery so I started looking for inspiration in books, but all I could see were weathered and beaten up gray farm style tables. That weathered look is nice, but I didn’t think it would look good in their backyard. I also think people should grow up with their furniture and see it weather themselves through the years instead of getting furniture already weathered- their history unknown.

    [singlepic id=150 w=320 h=240 float=center]

    I took inspiration from the arched arbors. At first I wanted to incorporate arches into the design but decided that it was too obvious and predictable so I took the same elements from the supports that hold up the arches. The archway supports were made from 1″x2″ rectangular tubing, so that became my choice of material. When you step away from under the archway, the 1×2 lines going vertical becomes a strong element so I wanted to emphasize that vertical line. To do that, I let the legs shoot straight through the top so it’s visible from all around. This cohesion actually makes the two different material distinct in my opinion. In a lot of the metal and wood furniture on the market out there, the difference of metal and wood becomes kind of lost. Usually, the wood just sits on top or is let into a metal frame.

    [singlepic id=154 w=320 h=240 float=center]

    Now, the question was the wood. I was looking at using cypress, but on my drive to meet my metal worker in Elgin, I saw a sign on the side of the road ‘Sinker Cypress’. Sinker Cypress is logs that have been submerged underwater for decades and sometimes centuries. The logging industries used to float logs down the river as a means of transportation to the milling factories, but sometimes the logs sink underwater and was forgotten until recently. Recently, loggers have found these old cypress logs that have been preserved underwater due to the lack of oxygen. Sinker cypress has beautiful colors ranging from olive to gold. To read more about it, visit here.

    [singlepic id=157 w=320 h=240 float=center]

    One thing I don’t like about picnic tables is that the ends of the boards start moving and becomes misaligned. To help with this issue, I decided to add a breadboard on the ends. This breadboard will keep the many boards aligned and also helps to cover up the endgrains (end of the board) since endgrain is like a straw- it sucks up the moisture. To help shed water, the boards have 1/8″ gap between the boards. The sinker cypress is finished using Penofin, which is a type of outdoor oil designed for decking and siding. It’s not the most durable finish out there, but it’s easy to fix and maintain.

    [singlepic id=153 w=320 h=240 float=center]

  • FWC-18′ conference table

    FWC-18′ conference table

    fwc18-9

    The good people of Far West Capital are so awesome that their business and staff just keeps getting bigger and bigger. I had made a 12′ conference table for them a few years ago, and they’ve already outgrown that one, so they commissioned me to make a 18′ conference table this time. They loved the traditional meets modern aesthetic of the last one, so we decided to design something that looks totally different from the last one, yet feels similar.

    [singlepic id=162 w=320 h=240 float=center]

    This was by far the biggest project I’ve had the opportunity to work on and logistics became the first and foremost in the design aspect. How can I make these parts in my shop and how can I break the pieces up so I can move it safely and easily? I decided that the top will be made from 3 parts and I wanted to make the top as light as possible since that has the biggest area. To support the top, there are thick and wide aprons that come apart and fit together with notches made in the wood. This gives stability to an otherwise flexible top. The aprons rest on pedestals that are angles and tapered in almost every direction. The taper came from trying to gain as much foot space as possible without sacrificing stability. One side of the pedestal is held in with clips so you can remove it to store and hide conference table equipment. At the feet there is a 1/4″ blackened plate steel that adds weight and distributes the footprint out so the top wont tip over.

    [singlepic id=145 w=320 h=240 float=center]

    The whole table is made from peruvian walnut veneered panels with solid wood edging. The removable center piece is made of spalted beech. Spalted is a figure in wood caused by fungal attack. The wood is left for fungus to attack, but then harvested before the wood rots completely and becomes unusable. It’s characteristics are black vein like lines with wood tones around it being different. I think the spalted beech was a nice compliment to the peruvian walnut and adds a little bit of country to the otherwise sophisticated elements.

    [singlepic id=147 w=320 h=240 float=center]

    To break up the large dark surface and to give a nod to traditional furniture we chose to inlay cross banding around the border. Cross banding is inlayed wood that is aligned so the grain is oriented side to side across the length. The outer cross banding is made from Bolivian rosewood and the inner cross banding that borders the spalted beech is Macassar Ebony. I feel the different tones in the woods give a nice transition to the different woods.

    [singlepic id=144 w=320 h=240 float=center]

    Sixteen people can sit all around the table easily and maybe a few more if people are willing to get close and cozy with each other. I think this design is a success because the real design elements are in the small details.


  • Tambour sideboard

    Tambour sideboard

    sideboard9

    I was approached to design a credenza/sideboard that matches a conference table I made in the past. A+L Conference Table. The main purpose for the sideboard was a storage unit that housed all their conferencing equipment when they weren’t using it as well as all the wires and misc things that should be hidden when it’s not used. The sideboard also makes a great platform to showcase all the awards they have won in the past.

    [singlepic id=124 w=320 h=240 float=center]

    Since there wasn’t a whole lot of space between the wall and the conference table chairs, I wanted to avoid having a door that swings out- especially if they needed the cabinet open for one reason or another. That left me with sliding doors or tambour doors as the options for the doors. Tambours are doors that slide in a track and roll so that it’s able to tuck into the sides and hide behind the back panel. You see this used on roll top desks.

    [singlepic id=127 w=320 h=240 float=center]

    After our design meeting, the client and I both agreed that tambours were the better choice for this situation. Not only does it look nicer, it’s a better solution functionally since you can reveal just the center shelf area, or open it all the way to showcase the whole interior of the cabinet. I also believe tambours have a certain nostalgic feeling that reminds us of beautiful furniture of the past.

    [singlepic id=130 w=320 h=240 float=center]

    The design inspiration came from mid-century modern furniture. I think the simplicity in form of the designers of this era got it just right. It’s hard to improve upon it, so I left the lines as clean as possible and tried to let all the details shine. Like many of SYD furniture, the eye is in the detail and the craftsmanship. Spend time on those elements and you don’t need fancy or unusual forms to stand out.

    [singlepic id=125 w=320 h=240 float=center]

    Most of the furniture in the room is made of pecan, so pecan was the natural choice of wood for this project. We didn’t want the room to look like a forest of pecan, so we decided to make the tambour doors out of a different, but complimentary wood. In this case, we decided on teak. The warm color of teak and the rich grain makes the door the focal point without taking all of the spotlight.

    [singlepic id=129 w=320 h=240 float=center]